Tel/WeChat:
  Email:
 Home
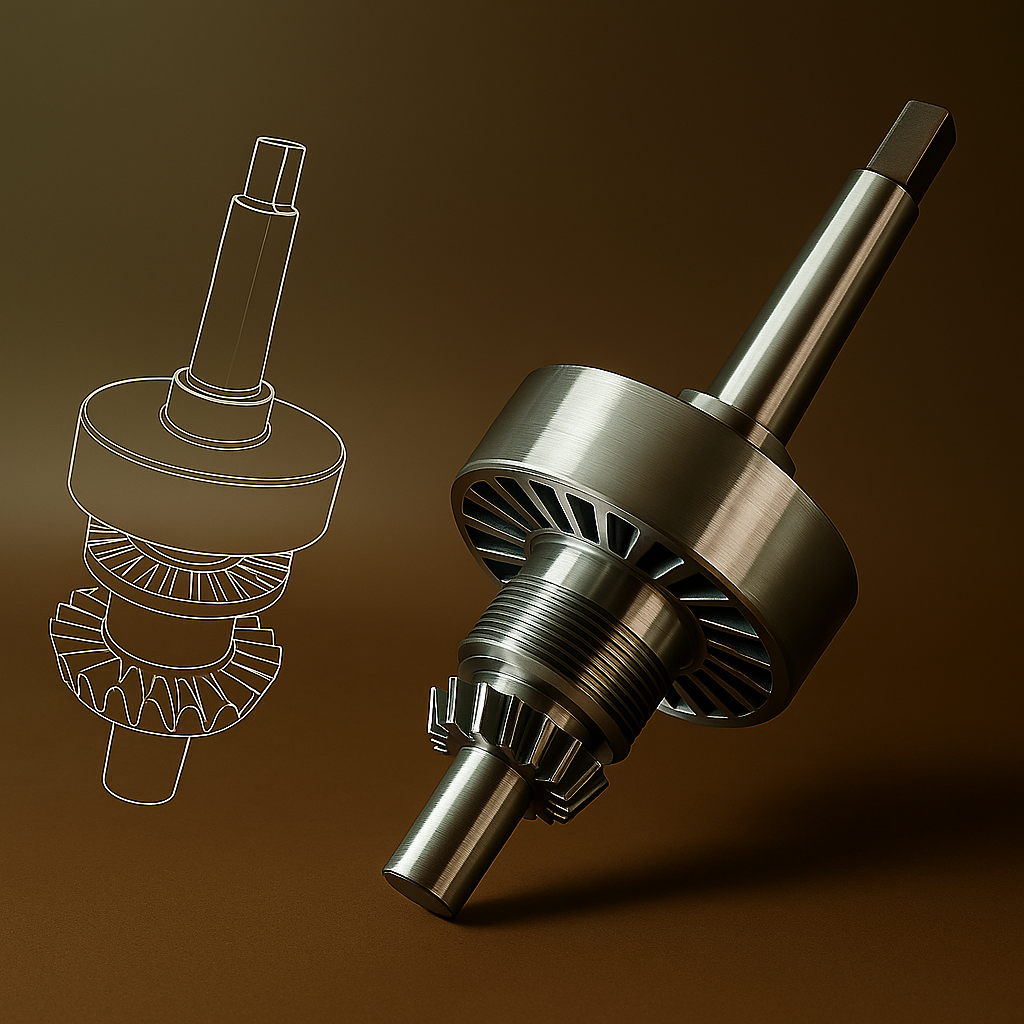
HomeWhat Is Rapid Prototyping? Methods, Materials, and Steps

 Published:Nov 12,2025
Rapid prototyping (RP) refers to manufacturing methods or technologies that produce parts, components, or models faster and with shorter cycles than traditional prototyping.
Rapid prototyping is not one single process. It’s a decision: choose the fastest manufacturing method that can meet your target material, accuracy, surface finish, and quantity. Common options include CNC rapid prototyping (subtractive manufacturing), additive manufacturing, and soft tooling such as urethane casting.
In this guide, we explain what rapid prototyping is, when to use it, the most common methods and materials, and a practical workflow you can follow from first CAD to production-ready designs.
What Is Rapid Prototyping?
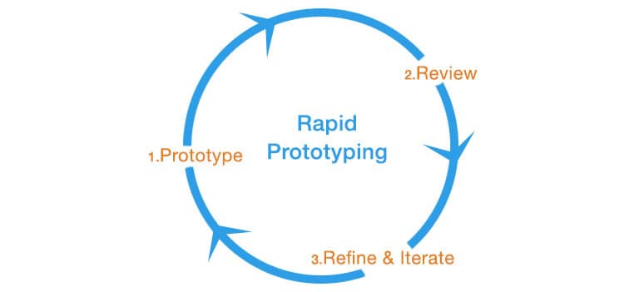
Rapid prototyping is an early-stage development step where you build prototypes fast to support frequent design iterations. It is a prototyping development that is fast manufacturing. We can define RP in two ways:
How to Define Rapid Prototyping?
Rapid prototyping is the process of fabricating a component or model through various techniques to achieve faster and more effective production. With the help of RP, the multiple iterations components are manufactured and tested to obtain the optimal design. CNC is the most used technique for producing components with this process.
What Is Rapid Prototyping in Design Thinking?
The design team builds a simple first version of a new product through rapid prototyping in product design. This first version is considered a minimum viable product (MVP) featuring the basics of the actual product. MVP is developed to show the customer and gather their feedback on the design. Engineers use fast tools such as CNC for fabrication in order to test many designs in a short period of time.
Rapid Prototyping vs. Traditional Prototyping
In traditional prototyping, engineers build temporary models of the components using traditional manual tolling and techniques such as MIM (Metal injection molding). Using these techniques was economically unfavorable and time-consuming. However, with rapid prototyping, variant designs of the components are built within a short time frame using their CAD models. These designs resemble with actual product closely in geometry, tolerance, and structure.
By using rapid prototyping, such as CNC designs, unique features and geometries can be developed that even an experienced engineer may not be able to create. Unlike prototyping with the help of rapid prototyping, engineers can visualize the designs to find glitches before sending them to production.
When to Use Rapid Prototyping?
After understanding what prototyping is, we will now know about the situations or steps where you can utilize this technique for more effective production.
Concept and Design Prototypes
Rapid prototyping is ideal during the early design phase to visualize concepts and evaluate designs before full-scale manufacturing.
Complex Geometry Prototype
Rapid prototyping is used when traditional prototyping is not capable of producing parts with complex geometries and high precision. Rapid prototyping technologies like CNC machining can help with such designs.
Lead-Time or Supply-Chain Delays
Rapid prototyping is highly effective for the quick production of functional components without compromising quality.
How Many Methods to Do Rapid Prototyping?
Understanding the various aspects of prototyping, such as component geometry, required strength, material compatibility, and the level of design flexibility needed, various methods are adopted for prototyping. Based on these multiple needs and applications, here we have outlined the most well-known methods and their practical use in the manufacturing industry.
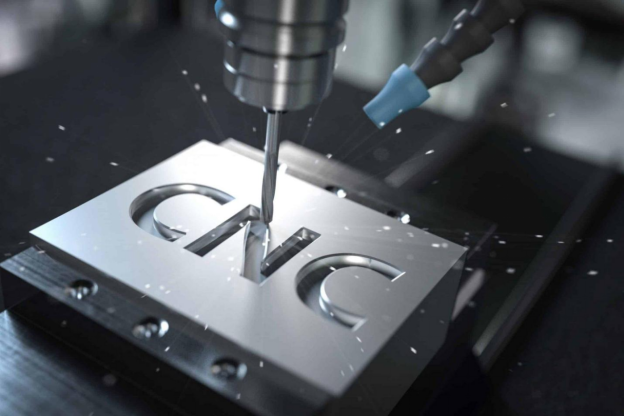
Rapid Prototyping CNC Machining
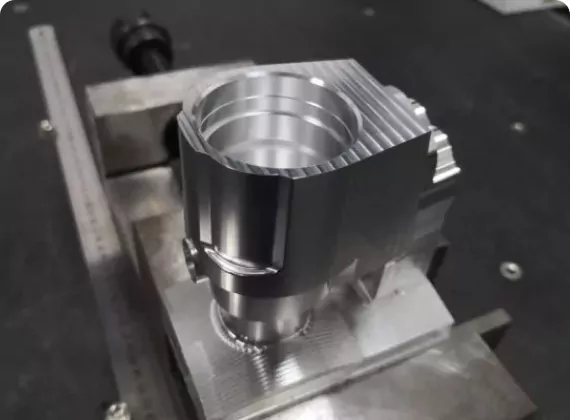
CNC (Computer Numerical Control) machining is a go-to subtractive method for small-batch rapid prototyping. It is fast to deliver, easy to repeat, and can hold tight tolerances with consistent part-to-part results. CNC machining also produces clean surfaces that often need little or no secondary finishing. Another key benefit is material flexibility—shops can machine many common prototype materials, including metals, plastics, composites, and some ceramics. In most cases, the process starts from bar, rod, or plate stock, which is then cut by milling or turning into the required shape.
CNC machining is not only for small-batch prototypes. It also scales well for larger production runs, especially for custom parts that need stable quality and prototyping for tight tolerances. Typical examples include automotive components, industrial equipment parts, and other repeat-order machined items where consistency, traceability, and on-time delivery matter.
Additive Manufacturing
Additive manufacturing is another well-known technique used in rapid prototyping when components with complex geometries are required. The process includes sheet metal fabrication, such as brackets, enclosures, and EMI shields. There are multiple additive manufacturing processes that are adopted in RP, which build prototypes layer by layer through multiple ways, some of which are:
- Laser Powder Bed Fusion (LPBF): With the help of an LBF, engineers can develop complex components with high precision, such as internal channels and lattice structures. Although you can achieve tight tolerance with LPBF, you may need to subject the component to heat treatment and surface finishing to relieve stress and improve surface texture.
- Multi Jet Fusion (MJF): Another additive manufacturing technique that uses an inkjet array to fuse metal powder. It is used in manufacturing high-end prototypes with intricate features, including housings, clips, and assembly fixtures.
- Selective Laser Sintering(SLS): In this technique, high-power lasers are used for developing prototypes layer by layer with the help of CAD designs. This process is applied when parts require durability for mechanical testing or assembly trials.
Urethane Casting and Soft Tooling
This method uses silicone molds and urethane resins to create small-batch prototypes mimicking injection-molded parts. The process provides good surface finish, consistent dimensional accuracy, and material options that can simulate the behavior of ABS, polypropylene, or rubber-grade components.
Rapid Prototyping vs. 3D Printing
It is essential to understand the difference between RP and 3D printing, as 3D printing is just one subset of rapid prototyping. Whereas rapid prototyping involves many techniques, such as CNC machining, Additive manufacturing, urethane casting, and more.
CNC Machining for Rapid Prototypes
Since CNC machining is widely used in rapid prototyping, it is important to understand when its a better choice.
When CNC Is the Better Choice
CNC is considered an ideal choice when engineers need to prototype a simple metal component with a tight tolerance of about ±4 μm and high precision.
Components requiring high strength and superior mechanical properties are produced in large volumes through CNC.
When manufacturers need to validate the thermal and mechanical properties of the final components, the prototypes are manufactured using actual material through CNC machining.
Main Advantages of CNC Machining
CNC machining offers numerous advantages in rapid prototyping, such as:
- Scalability: With the help of CNC machining, engineers can produce the required number of prototypes from small numbers to large-scale production with the same precision and accuracy.
- Design Flexibility: In CNC machining, engineers can easily alter the design of the prototype through computer software and produce the required geometry component. By using multi-axis milling, they can manufacture components with complex and intricate geometries as well.
- Versatility: By using CNC or prototyping, prototypes of multiple materials are developed, such as Aluminium, plastics, Delrin, and more. The material is selected based on the required thermal and mechanical properties.
- Accuracy: With CNC machining, highly accurate designed components are manufactured that meet tight dimensional tolerances.
- Fast Turnaround: Enables quick prototype delivery, especially when combined with digital CAD/CAM workflows.
- Superior Surface Finish: Produces smooth, high-quality surfaces suitable for operational testing or end-use parts.
Common Materials and Tolerances
CNC machining is a versatile technique for material selection. It can manufacture components using metals and plastics as well. The prototypes produced in aluminium and stainless steel exhibit higher tolerance than those produced in plastics such as Delrin. This is because of their rigidity and uniform structure, which provides precise dimensional control. Here we have summarised some of the most commonly used materials in prototyping through CNC machining:
|
Material Grade |
Key Material Properties |
|
Aluminum 6061‑T6 |
Good strength-to-weight ratio, excellent machinability, corrosion-resistant |
|
Aluminum 7075‑T6 |
High strength, moderate machinability |
|
Stainless Steel 304 |
Excellent corrosion resistance, good formability |
|
Stainless Steel 416 |
Free-machining grade, high strength, suitable for precision components |
|
Delrin (POM‑H) |
Low friction, high stiffness, remarkable dimensional stability |
|
PEEK (Polyether Ether Ketone) |
High temperature and chemical resistance, excellent mechanical performance, |
Machined Surface Finishes
CNC machining in rapid prototyping involves various surface finishing processes. Surface finish of a prototype is essential for its appearance and its workability; for example, a prototype with a smoother surface finish will show less friction compared to a matte finish. These are selected depending on the required surface properties. Here are some surface finishes:
- Bead Blasting
Prototypes requiring a mate or non-reflective surface finish are subjected to bead blasting. In this process, the uniform tiny balls are blasted over the surface to enhance the visual appearance.
- As a Machined Finish
Machined surface finishes which have minor tolling marks with a standard surface roughness (Ra) of about 3.2 μm.
- Anodizing
Anodizing is preferred for those components that are at high risk of corrosion during operation. Here, the surface may be subjected to coating, dyeing, or colouring.
- Polished Finish
Such a surface finish is achieved by mechanical polishing, buffing, or chemical polishing. It produces a mirror-like, high-gloss surface on the components requiring a sleek look.
Tips for Better DFM Prototypes
Here are some tips for better design for manufacturing(DFM) prototypes in CNC machining when designing parts:
Limit Critical Tolerances: In order to reduce setup time and overall cost of machining, only specify tight tolerances where necessary.
Accommodate a Center: For parts longer than 4× their diameter, design for a live or saddle center to stabilize the part during turning.
Minimize Non-Round Features: Restrict perpendicular or irregular features unless essential. Because of such designs, a multi-axis setup will be used, which will increase cost and lead time.
Clearly Call Out Undercuts: Specify which undercuts are essential for functionality. This will avoid unnecessary machining and confusion.
CNC Machining vs. Other Manufacturing Methods
When it comes to rapid prototyping methods, it involves techniques not only CNC but also 3D printing, Injection molding, and sheet metal fabrication. Here we will compare these techniques with CNC, so it will be easy to decide which one to go with. However, an accurate quotation is based on technical drawings and more details related to components.
CNC vs 3D Printing
|
Aspect |
CNC Machining |
3D Printing |
|
Process |
Subtractive (removes material from solid blocks) |
Additive (builds parts layer by layer) |
|
Materials |
Metals, rigid plastics, composites, ceramics |
Plastics, resins, powdered metals, and some composites |
|
Design Freedom |
Moderate: complex shapes possible |
High: supports complex geometries, |
|
Tolerance & Accuracy |
High: ±0.005″ (±0.13 mm) typical |
Moderate: ±0.1–0.3 mm; Z-axis less consistent |
|
Surface Finish |
Excellent: 0.4–3.2 µm Ra |
Variable; often requires post-processing |
|
Production Speed |
Faster for batch production; setup required |
Faster for one-off prototypes; slower for batches |
|
Cost |
Medium–high for single parts; decreases with volume |
Low–medium for single parts; less sensitive to volume |
CNC vs Injection Molding
To maintain flexibility, cost, and manufacturing speed, it is essential to know the prototyping method. Should you select CNC or Injection molding? Here are some key points to help you make a wise decision.
CNC does not require any mold; it is a subtractive technique that builds components directly from bar or rod, making it suitable and adequate for design development steps in prototyping. However, Injection molding requires typical molds for production, which are not only costly but also time-consuming.
Another important factor in contracting these two methods is precision and tolerance. CNC can produce components with a tight tolerance of about ±0.001 inches. At the same time, injection molding is about±0.003 inches because of material shrinkage during the cooling process.
CNC vs Sheet Metal Fabrication
In sheet metal fabrication, it is typically an additive process where metal sheets are subjected to cutting, milling, and forming to obtain the required components. Where in CNC, the bar is subjected to turning or milling to obtain the required prototype. CNC can be applied to a number of materials, including plastic, metals, or ceramics, whereas sheet metal welding can utilize metal sheets only.
Sheet metal fabrication involves a number of steps, which makes it time consuming compared to CNC, which involves automated steps.
The cost-effectiveness of these techniques depends on volume. For example, for simple parts in large quantities, sheet metal fabrication can be economical. However, CNC machining provides greater flexibility and speed for prototypes and small-batch production.
How to Select Materials for Prototyping
It is essential to select the right material for rapid prototyping to ensure the prototype accurately reflects the intended performance of the final product. Don't let your prototype waste select material according to the requirements. For your ease, here we have compiled essential information to make a wise decision:
Design Purposes
Focus on the specific working of the component and select the material based on the required strength and mechanical properties. As each part’s design purpose dictates the material requirements, including strength, stiffness, wear resistance, and machinability,
Engineering Plastics
High-performance plastics are considered suitable for CNC machining and functional prototypes. For example, if components are subjected to bear high temperatures, select PEEK, and for more smoother surface finish and frictionless sliding, you can go with POM (Delrin), and Nylon
Metals for Prototyping
Different metals are used in rapid prototyping for components that require high strength, dimensional stability, and heat resistance. Some common metals including:
- Aluminum (6061 and 7075)
- Stainless Steel( 304 and 316)
- Steel Grades (1018 and 4140)
Titanium Grades: Titanium is considered the best choice when a high strength-to-weight ratio, excellent corrosion resistance, and lower machinability than aluminum or steel are required.
Ceramics and Composites
Ceramics are selected when high hardness, wear resistance, and thermal stability are important in prototyping. Whereas two or more materials are combined to form composites to achieve the desired properties, such as Alumina (Al₂O₃) for wear-resistant components, such as for grinding tools, or zirconia (ZrO₂) for high-temperature applications.
What Are The Limitations of Rapid Prototyping?
All manufacturing processes come with their own advantages and drawbacks, and so does rapid prototyping.
Benefits of Rapid Prototyping
Faster Design and Feedback
RP paves the way towards fast iteration of components to get instant feedback from customers. You can personalize the design based on the prototype features, and redesigning can be done in the initial stages.
Lower Costs
Costly manufacturing revisions in mass production are prevented through rapid prototyping. Because of its ability to identify flaws in early design stages.
Improved Design Accuracy and Quality
With the help of this technique, engineers can build high-quality designs. Because it allows them to modify the design in CAD instead of building whole new components.
Material and Performance Evaluation
It enables the manufacturers to run experiments by building prototypes using different materials to check their performance under real-world conditions.
Lower Material Waste
Most of the RP methods, such as additive manufacturing, produce less waste compared to traditional prototyping techniques. This makes RP a more sustainable choice.
Companies like TOUFA, which utilizes rapid prototyping, have a competitive edge in the market to bring the design to fundamental components in a short period of time compared to other manufacturers.
Limitations of Rapid Prototyping
Small Batch vs. Large Batch Cost
One of the remarkable limitations of rapid prototyping is its cost per part in small-batch prototype manufacturing. This is because of the setup, tooling, and programming expenses. This makes it challenging for startups and small firms to find cost-effective suppliers for limited runs.
Time Consumption
In the RP process, the cost of the prototype production usually increases with the complexity of the component geometry. Prototypes involving intricate geometries or multiple machining setups require longer lead times, reducing overall efficiency in rapid development cycles.
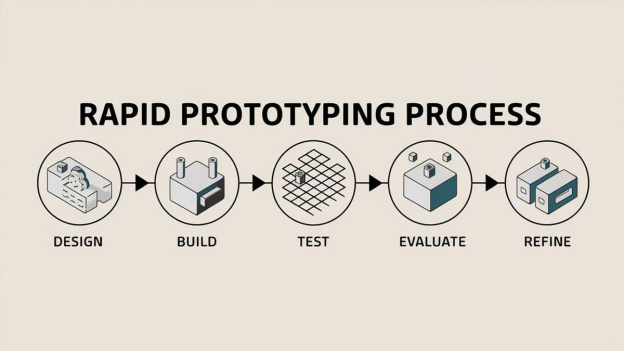
What Are the Steps in the Rapid Prototyping Workflow?
So you might have a question in mind: How to do rapid prototyping? This method actually follows a complete structural flow of steps from conceptualizing a design to building in the lab with the realistic features. Here is a detailed explanation of how this is performed.
1. Define Requirements
Start by clearly identifying or setting the requirements of the components. Clarify the required:
- Geometry
- Features
- Diameter
- Complexity
- Strength
- Mechanical properties of the component.
2. Select Prototyping Method
Now, based on the requirements, engineers select a prototyping method that can be used for developing the required part. Here, they consider the rest of the parameters, such as time cost and efficacy.
You can demand quotes for different manufacturing methods from the company. For example, if you contact TOUFA, you can ask them to send you quotes for various methods to develop the prototype of your required component.
3. Choose Prototyping Materials
When you have finalized the method, it is time to decide on the material based on the required properties and feasibility. You can also take advice from the expert team of engineers at TUOFA. They will recommend the best possible options. You can choose from metal, ceramics, or plastic-based material for your component development.
4. Build 2D&3D CAD
Here, engineers and designers will work collaboratively to generate accurate 2D engineering drawings and 3D CAD designs. These models will reflect the final parts:
- Geometry
- Tolerances
- Surface finish
- Assembly interfaces.
These 3D CAD drawings are considered essential for quotation, tooling simulation, and manufacturing planning.
5. Prepare Manufacturing Files
After building the CAD model now it's now time to prepare a manufacturing file containing all necessary requirements for proper manufacture without any errors. These files are in formats such as STL, STEP, or native CAD, specifically based on the supplier’s requirements.
6. Seeking a Suitable Manufacturer
Now that you have CAD designs of your component, you can evaluate different manufacturers based on multiple aspects:
- Evaluate based on:
- Material range capability
- Lead time and quoting transparency
- Machine accuracy and inspection equipment
- Previous functional prototype experience
7. Fabricate the Prototype
After all these steps, when you finalize a manufacture, their engineers will now work to fabricate the components using the finalized technique, such as CNC machining or Additive manufacturing.
8. Post-Process and Finish
When the prototype is manufactured based on the surface mechanical and physical properties, the components are subjected to post-processing. It may involve anodizing, polishing, blasting, or powder coating.
9. Inspect and Measure
It's time to inspect the essential properties like dimensions, tolerances, and specified finishes using CMM, optical, and surface roughness gauge. Manufacturers like TOUFA offer inspection services as part of their one-stop solution.
10. Functional Test
Finally, the prototype is subjected to testing under real conditions. Its performance is checked through corrosion test, humidity test, load and temperature bearing test. These tests help ensure that components produced will be up to the mark or requirements.
11. From Prototype to Production
Here are some tips about how to go from prototype to production:
|
Tips |
Action |
Outcome |
|
Verify Prototype |
Confirm prototype meets all functional and dimensional requirements |
Ready for production, reduces revisions |
|
Simplify Geometry |
Remove unnecessary complexity based on test feedback |
Easier manufacturing, less material waste |
|
Adjust Tolerances |
Balance quality with machining cost |
Efficient production without compromising performance |
|
Select Production Method |
Choose processes suitable for high-volume output |
Scalable, consistent, and efficient |
|
Define Quality Controls |
Set inspection and testing criteria |
Ensures reliability and consistency |
|
Confirm Supplier Readiness |
Verify capacity, lead times, and logistics |
Smooth production transition, avoids delays |
|
Review Cost and Schedule |
Reassess unit cost, tooling, and timelines |
Economically feasible and on-time production |
How to Find Suitable Manufacturing Prototype Companies?
When you are making a new project for your small-batch prototyping and production, there are lots of recommendations. It is hard to find some proper factories that provide affordable and quality batch production. Or you will go to search on the online platform, or asking AI models like ChatGPT, Gemini and something more. Here is a checklist, which will help you boost your efficiency:
- First, confirm they are the right rapid prototyping company for your part
Before you compare prices, make sure the rapid prototyping factories you shortlist truly match your process and part type. Many manufacturing prototype companies claim they can do everything, but you need a direct fit.
|
What you need |
Ask the rapid prototyping company |
Pass standard |
|
Process match |
"Do you produce this via CNC, 3D printing, casting, or sheet metal?" |
They recommend 1–2 best processes (not "all") |
|
Part type match |
"Have you made similar product prototype parts before?" |
Similar case examples + photos/data |
|
Capacity match |
"Can you support prototype + small batch ramp-up?" |
Clear batch range + lead time options |
- If you need plastic prototypes, check plastic grades and finishing options
When you contact plastic prototype companies or plastic prototype makers, the key is not only "ABS/PC," but the exact grade, strength needs, and surface finish.
|
What you need |
Ask plastic prototype makers |
Pass standard |
|
Plastic material match |
"Which plastic grades can you source (ABS, PC, PA, POM, etc.)?" |
Specific grades or close equivalents |
|
Finish expectation |
"Can you do bead blast, texture, paint, dye, or clear finish?" |
Finish list + sample photos |
|
Functional testing |
"Can the plastic prototype be used for fit/function tests?" |
They explain limits and best process |
- If you need prototype machined parts, confirm CNC capability and tolerance range
For prototype machined parts, you are not only buying a part—you are buying process control. A serious prototyping firm will clearly state machining limits.
|
What you need |
Ask the prototyping firm |
Pass standard |
|
CNC capability |
"What machines do you use (3/4/5-axis, turning, Swiss)?" |
They match machine type to your geometry |
|
Tolerance target |
"What tolerance can you hold for this part?" |
Realistic tolerance + notes on critical features |
|
Threads/holes detail |
"How do you handle threads, deep holes, thin walls?" |
Clear guidelines + do/don’t list |
- For high-precision prototyping services, verify inspection and measurement proof
If you search for high-precision prototyping services, do not accept claims only. Ask for measurement methods and a sample inspection report.
|
What you need |
Ask high-precision prototyping services |
Pass standard |
|
Inspection method |
"Do you use CMM, optical measurement, gauges?" |
Tools listed + when each is used |
|
Proof of accuracy |
"Can you share a sample inspection report?" |
Real report format (not a simple photo) |
|
Control plan |
"How do you control critical dimensions?" |
Defined checkpoints + acceptance criteria |
- Confirm they can support design input like a rapid prototype design company
Even if you already have CAD, a good supplier will flag risks early. If you need design refinement, treat them like a rapid prototype design company and check what they actually deliver.
|
What you need |
Ask a rapid prototype design company |
Pass standard |
|
DFM feedback |
"Do you provide DFM notes before production?" |
Written DFM suggestions with alternatives |
|
Drawing support |
"Can you help convert/clean drawings and tolerances?" |
Clear deliverables + revision cycle |
|
IP protection |
"Can we sign an NDA before sharing full files?" |
NDA ready + clear file handling rules |
Conclusion
In short, rapid prototyping is a key step in the development of components in various industries, including automotives, aerospace, and engineering. With the proper prototyping method, you can ensure faster development, accurate performance testing, and a smoother transition to full-scale production. At TUOFA, we provide one-stop custom prototyping solutions to support your project at every step. So, without any delay, you can request the quote today.
FAQs
How long does rapid prototyping take?
Rapid prototyping can take from a day to a few weeks. The time frame of this process depends on the complexity of the geometry of the required design, material, and changes needed in the design.
 Machinist Tools in Machining: The Must-Have List for Beginners